
Let’s take a look at how to reduce the size of the bloated WSUS data partition. There are no direct instructions for this from Microsoft, but there is a way that I have used successfully several times in recent years. We are concerned with the WSUS folder in which the updates are stored and not with cleaning up or optimizing the WSUS SQL database or Windows Internal Database (WID). There are already ready-made Powershell scripts for this in Technet. Just search for WSUS DB Cleanup.
1. increase WSUS Partition (if required
Every administrator is familiar with the problem of growing WSUS data. If the server is virtualized, you can usually simply expand the attached virtual hard disk. If the box is running on a physical server, this is much more difficult. By cleaning up the WSUS, we ensure that the WSUS reloads and deploys new updates or runs again if the WSUS has run out of disk space.
Even “wsusutil /reset” no longer helps.
Translated with DeepL.com (free version)
But how big should the WSUS partition be?
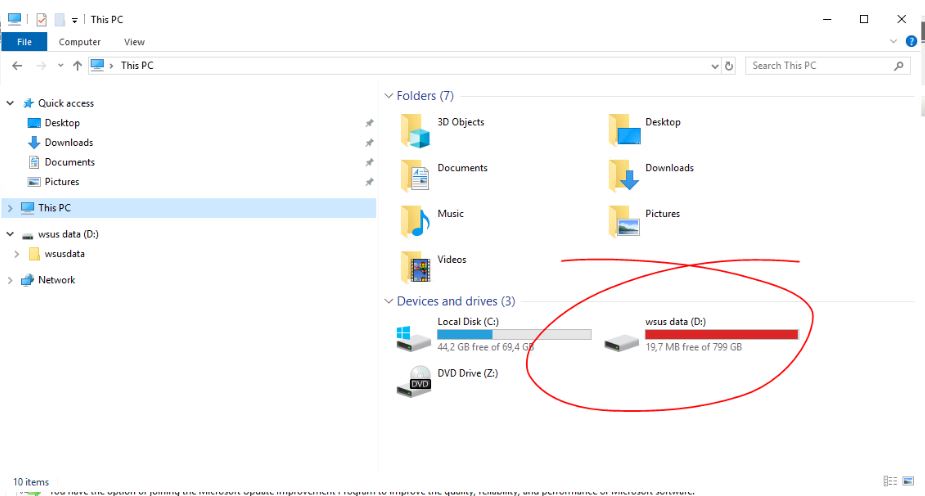
My largest WSUS had grown to 800GB in 2021 and I didn’t really know why. On other WSUS servers with similar IT equipment, the size was around 400GB. It is clear that the longer the server runs (years) and the less it is freed from old unused updates, the bigger it gets!
2. decline/remove no longer needed Windows updates
After the data partition has been enlarged (if the WSUS is no longer running), we now need to remove updates that are no longer required.
We have the following options:
- old products that are no longer used e.g. MS Office 2013
- old operating systems e.g. Windows Xp, Windows 7 etc.
- replace updates
- Old updates that are no longer required
Removing old products and operating systems from the WSUS
If you want to remove updates of old products or operating systems, it is best to create a view that only shows the updates of the unwanted products. Then go into the view, select all, right-click => “Decline”.
remove replaced/superseeded Updates from WSUS
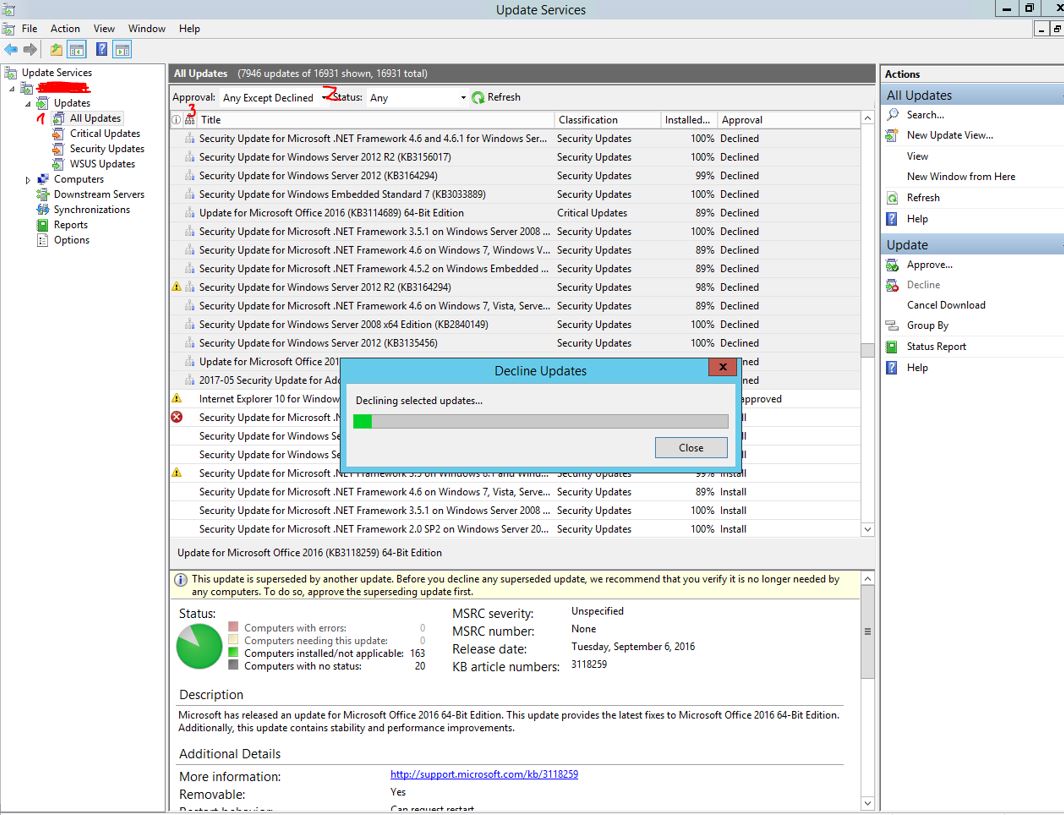
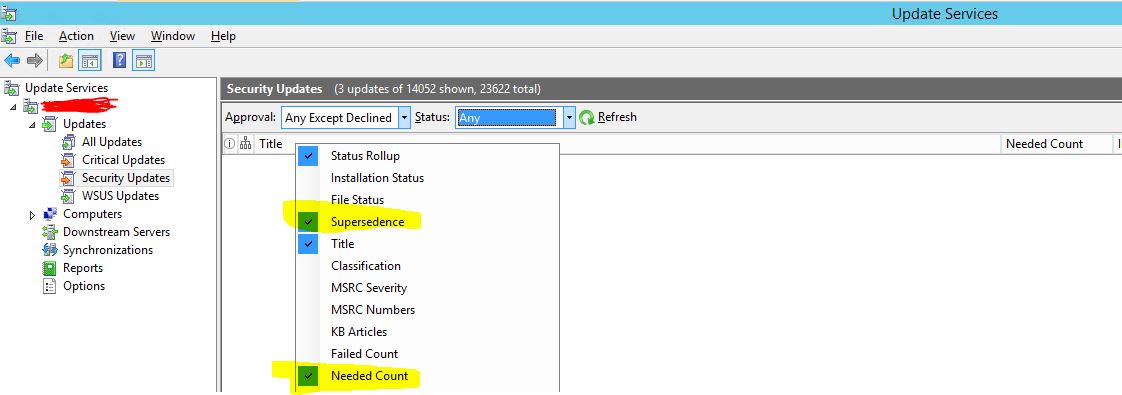
Go to the “All Updates” view and configure the filter as follows:
- Approval: Any Except Declined, “any/all except declined”
- Click on Refresh
You will then see the additional columns “Supersedence” and “needed count”. You can use the supersedence to see whether the update has already been replaced or whether it is the “latest” update at the top. To do this, you must pay attention to the self-explanatory symbols.
The “Needed Count” column shows you whether the update is needed by computers or not. In most cases, replaced updates have a Needed Count of 0.
How to remove no longer needed Updates from WSUS
Same procedure as in the section “Remove replaced updates from the WSUS”, but here we pay attention to the “Needed Count” of 0.
3. running Cleanup Wizzard
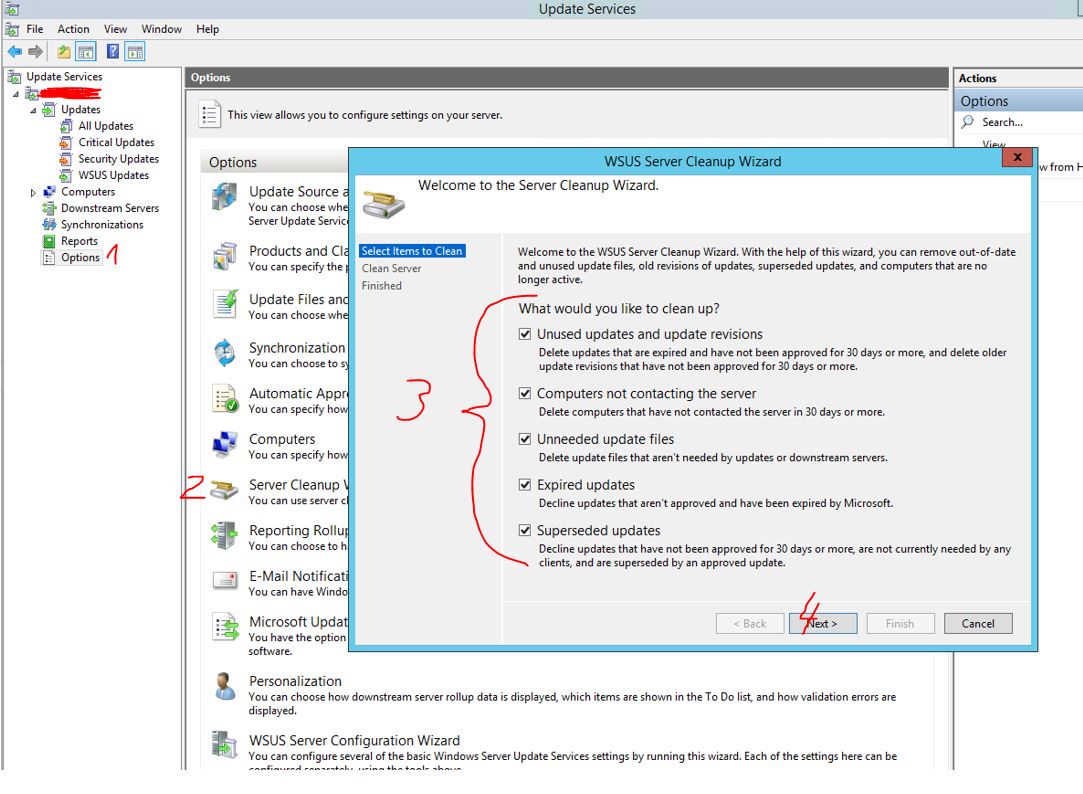
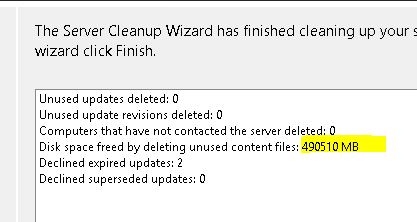
After the updates have been rejected, the Cleanup Wizard now makes its grand entrance. It may run for a long time and crash in between. In this case, simply start it again and select only one point at a time!
4. cleanup WSUS filedatabase
Now run the WSUS Cleanup Wizard, which deletes all rejected updates from the file database (not SQL DB or WID).
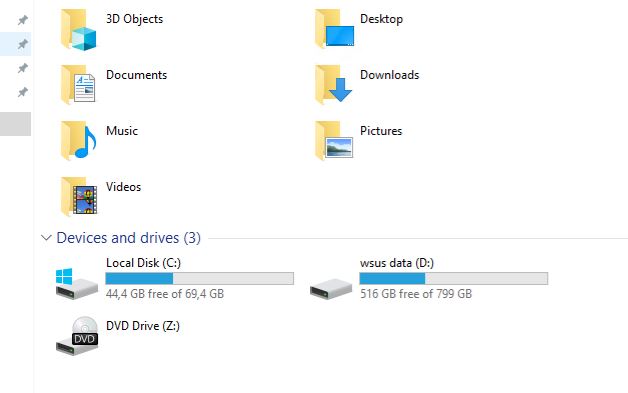
You should then have a lot of free disk space available again.
Simply reducing the size of the data partition to obtain more available storage space is not an option. Of course you can shrink the partition in Windows Disk Management, but VMWare will not be able to shrink the virtual hard disk.
Therefore, you create a virtual hard disk in your hypervisor, e.g. in VMWare, initialize and then format it in Windows Disk Management and give it a drive letter. For me it is “E:”.
Now it’s time to get out the powerful wsusutil and move the data to the new partition. more info on WSUSUTIL
You do this with the following command, which moves the entire WSUS database (file system) to partition E:
cd "c:\Program Files\Update Services\"
wsusutil movecontent e:\wsus e:\wsus_content.log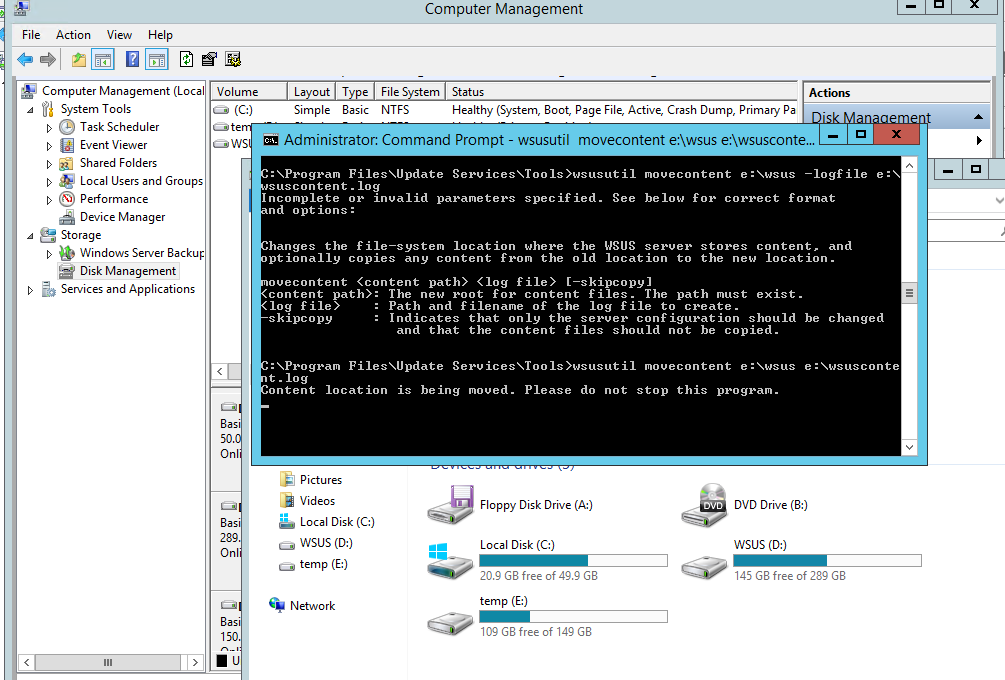
Depending on the size of the folder, this can now run for some time to several hours.
You can then remove the old hard disk from the virtual machine.
Done.
more articles about WSUS Administration, Powershell and Co.
- How to cleanup WSUS and resize datapartition
- WSUS bereinigen und Datenpartition verkleinern
- WSUS auf SSL umstellen
- WSUS auf Windows Server 2019 installieren – komplett
- WSUS und Windows Update Troubleshooting
- WSUS Client – minimale Registry Einstellungen
- WSUS Tuning, Konsolen Timeout beseitigen
- WSUS Cleanup Wizzard per Powershell remote starten